Access the Configuration Menu:
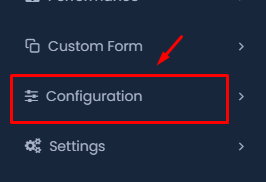
- From the dashboard, locate the Configuration option on the left-hand side menu.
- Click on Configuration to expand the options.
Select the Department Option:
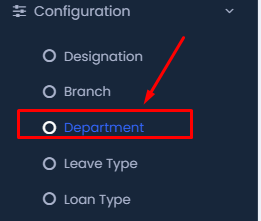
- In the expanded Configuration menu, find and click on the Department option. This will direct you to the Department configuration page.
Add a New Department:
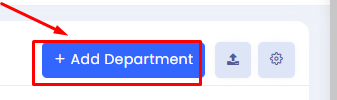
- On the Department configuration page, click the + Add Department button located at the top right corner.
Enter Department Details:
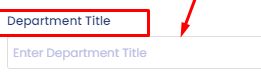
- A form will appear where you can enter the Department Title. Type in the name of the department you wish to add.

- In the Short Code field, enter a shorthand or abbreviation for the department. This will help in quick identification.

- Optionally, you can upload a logo for the department by clicking the Choose File button under the Logo Attachment section.
Set Department Status:

- Toggle the Status switch to activate or deactivate the department. Ensure it is turned on (blue) if you want the department to be active.
Save the Department:
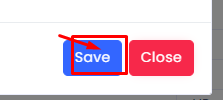
- After filling in all the necessary details, click the Save button at the bottom of the form to store the department configuration.
Import or Export Department Data
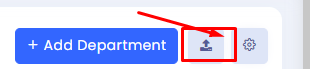
- If you need to import or export department data, click on the import/export icon next to the + Add Department button.
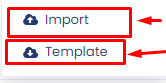
- Choose Import to upload department data from a file, or select Template to download a template file for bulk uploads.
Final Check:
Ensure all details are correct and that the department is listed under the Department section. If needed, repeat the process for additional departments.
These steps will guide you through the process of adding and configuring a department in your system efficiently.