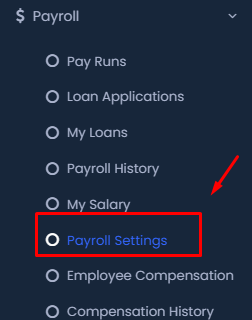
Step 1: Access the Payroll Menu

- Click on the ‘Payroll’ option to expand the payroll menu options.
Step 2: Open Payroll Settings

- Under the Payroll menu, select ‘Payroll Settings’ to open the configuration options.
Step 3: Navigate to Component Settings

- In the Payroll Settings, click on ‘Component Settings’ to manage and customize the payroll components.
Step 4: Add a New Payroll Component

- In the Component Settings, click on the ‘Add New +’ button to start configuring a new payroll component.
Step 5: Enter Component Details

- Enter the title of the payroll component in the ‘Title’ field.

- Select the appropriate category for the component from the ‘Category’ dropdown menu.

- Choose the component group under which this payroll component will fall by selecting an option from the ‘Component Group’ dropdown.
Step 6: Additional Settings

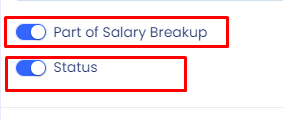
- Toggle the ‘Part of Salary Breakup’ switch if the component is part of the employee’s salary breakup.
- Toggle the ‘Status’ switch to enable or disable this payroll component.
Step 7: Save the Component

- Click the ‘Save’ button to save your new payroll component configuration.
By following these steps, you can effectively configure payroll components in your HRMS, ensuring accurate and efficient payroll management.
