Step 1: Access the Attendance Section

- Navigate to the Main Menu: Locate the “Talent Management” section on the left side of the dashboard.
- Select Attendance: Click on “Attendance” under Talent Management.
Step 2: Open the Overtime Application

- Click on “My Overtime”: In the Attendance menu, select “My Overtime” to open the section where you can manage your overtime applications.
Step 3: Start a New Overtime Application

- Click on “+ Apply For Overtime”: In the My Overtime section, click the “+ Apply For Overtime” button.
Step 4: Enter Overtime Details

- From Date: Select the start date and time for your overtime.

- To Date: Select the end date and time for your overtime.

- Applied Overtime Minutes: Enter the total overtime minutes worked.

- Salary Amount Per Hour: Ensure the correct hourly rate is displayed.

- Total Amount of Overtime: The system will auto-calculate this based on the entered minutes and hourly rate.
Step 5: Provide Additional Information

- Reason: Enter the reason for working overtime.

- Overtime Type: Choose between “Mandatory” or “Voluntary” overtime.

- Add Images: If required, upload any supporting documents or images.
Step 6: Submit the Application

- Save and Submit: Review your information carefully. Once confirmed, click the “Save” button to submit your overtime request.
Step 7: Filter and Manage Overtime Requests

- Filter Requests: Use the filter option to narrow down your search by Overtime Type, Overtime Status, or Month.

- Select Overtime Type: Filter your requests by selecting the desired Overtime Type.

- Select Overtime Status: Filter by Overtime Status to view requests that are pending, approved, or rejected.

- Filter by Month: Narrow down your search by selecting the specific month for which you want to view overtime requests.

- Search and Reset Filters: After selecting your filters, use the Search button to apply them. You can reset all filters using the Reset button.
Step 8: Edit or Delete Overtime Requests

- Access Request Options: Click on the three dots beside the Status of a specific request.

- Edit, Delete, or View: From the dropdown menu, select Edit to modify the request, Delete to remove it, or View to see the details.
Step 9: Monitor Request Status

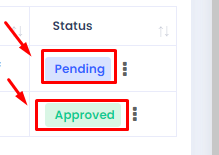
- Check Status: View the status of your overtime requests, which could be Pending, Approved, or Rejected.
By following these steps, you can effectively apply for overtime, filter through requests, and manage them efficiently in the system.
